How to Improve Your Shopify Website Speed Without a Developer
Improving your Shopify e-commerce website’s speed is crucial for keeping customers happy and boosting sales. A faster site means shoppers can browse and buy without frustrating delays. The good news is you don’t need to hire a developer to speed up your Shopify store – there are many steps you can take yourself.
In this guide, we’ll explain how small business owners on Shopify can improve website speed with simple, actionable tips. Each section below breaks down a key strategy in plain language, focusing on people-first advice while also aligning with SEO best practices and E-E-A-T guidelines for accuracy and trust.
Why Website Speed Matters for Shopify E-Commerce
Website speed isn’t just a technical issue – it directly affects user experience, sales, and even search rankings. Customers are impatient with slow sites. In fact, about 53% of mobile visitors will leave a page that takes longer than 3 seconds to load.
Every additional second of page load time can significantly hurt your conversion rates – one study found each extra second can lower conversions by around 20%. This means a slow-loading Shopify store could be losing you sales.
Fast load times create a better user experience, leading to lower bounce rates (fewer people leaving immediately) and higher chances that shoppers will explore your products. Speed is also a factor for SEO: Google considers page speed a small ranking factor.
A faster site can help you rank slightly higher in search results and improve your visibility. Moreover, all your marketing efforts (from social media to email campaigns) perform better if your site loads quickly.
How to Test Your Website Speed
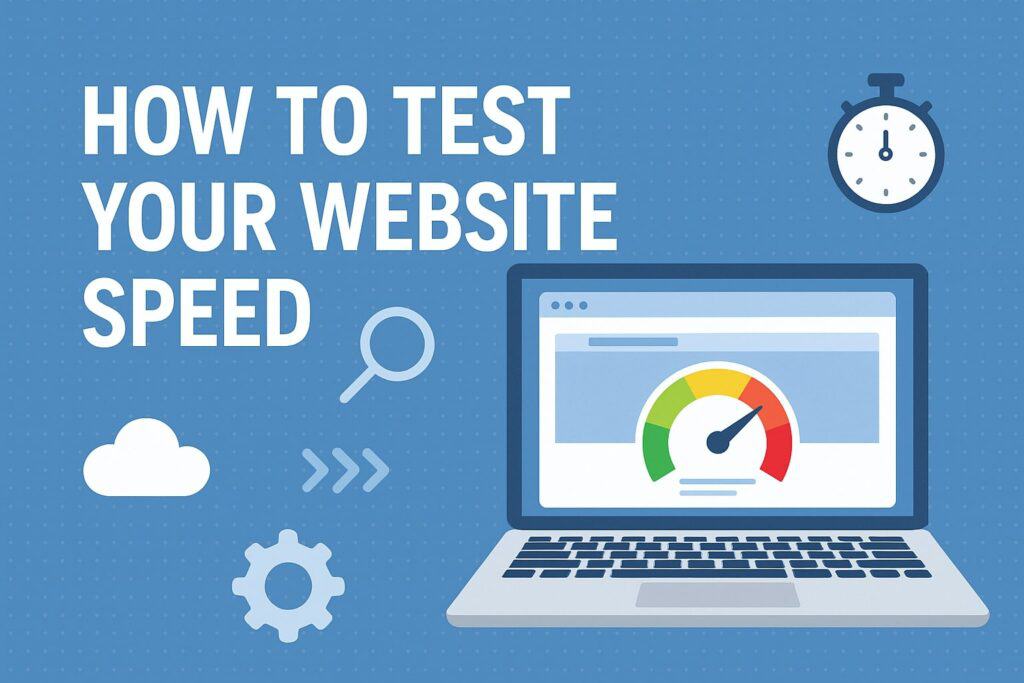
Before making improvements, it’s important to measure your current website speed. Start by using free tools like Google PageSpeed Insights to analyze your Shopify store’s performance. Simply enter your homepage or a product page URL and review the results.
PageSpeed Insights will show you key metrics – for example, First Contentful Paint (how quickly content first appears) and Time to Interactive (when the page becomes usable). It will also provide suggestions for improvement.
Another useful resource is your Shopify Speed Score or Web Performance report in the Shopify admin. Shopify’s performance reports use real-world browsing data (Core Web Vitals) to measure how fast your store feels to shoppers.
You can find this in your Shopify admin dashboard, which gives an overall score out of 100 and highlights areas to improve. Additionally, tools like GTmetrix or WebPageTest can offer deeper insights on load times, page sizes, and requests. Running tests on both mobile and desktop is wise, since many e-commerce shoppers use mobile devices.
When testing, remember that some recommendations from generic speed tools may not fully apply to Shopify. For example, you might see suggestions to “enable compression” or “add a CDN,” but Shopify already does these things for you automatically.
Focus on the actionable items specific to your content (which we’ll cover below) – those are the areas where you as a store owner can make a real difference.
1. Choose a Fast, Lightweight Shopify Theme
Your Shopify theme forms the foundation of your site’s performance. Themes that are overly complex or packed with unnecessary features can slow down your store. Shopify itself notes that your theme is one of the biggest factors affecting web performance.
To improve speed without coding, start by using an up-to-date, optimized theme. All of Shopify’s free Online Store 2.0 themes (such as the default “Dawn” theme) are built with performance in mind. These themes have clean, efficient code and take advantage of Shopify’s latest speed optimizations.
If you’re open to switching themes or starting a new store, consider one known for fast load times. In performance tests of 200+ Shopify themes, some of the top performers included Booster, Electro, Plak, Mavon, and Shoptimized, each scoring in the high 90s on Google PageSpeed Insights. Here’s a quick look at a few high-speed Shopify themes and their PageSpeed scores:
| Theme | PageSpeed Score (Mobile) |
|---|---|
| Booster | 99 |
| Electro | 98 |
| Plak | 98 |
| Mavon | 97 |
| Shoptimized | 96 |
Tip: When choosing or updating your theme, avoid those with lots of heavy animations or bloated features you don’t need. Even within a theme, extra effects can hurt speed – for example, fancy page transition animations might look nice but can slow down pages.
Stick to a simple, clean design that showcases your products without excessive bells and whistles. Also be mindful of how many sections or blocks you add to a page. Having too many sections (for example, dozens of homepage content blocks) can increase load time.
Focus on the essentials that communicate your brand and products. By starting with a lean theme, you set your store up for faster performance from the get-go.
2. Optimize and Compress Your Images
Images are vital for e-commerce – product photos, banners, and graphics make your Shopify store attractive. However, images are often the largest assets on a webpage and can significantly slow down load times if not optimized.
In fact, images typically comprise around 25-30% of a webpage’s total weight on average. Optimizing your images is one of the most impactful speed improvements you can do without technical help.
Here are steps to optimize your Shopify images for faster loading:
- Resize images to proper dimensions: Upload images at the maximum size they will be displayed, and no larger.
For example, if your product image displays at 800×800 pixels on the site, do not upload a 2000×2000 image. Oversized images waste bandwidth and slow down pages. As a rule of thumb, avoid exceeding ~5000×5000 pixels or 20 MB per image file. - Compress images: Image compression reduces file size (bytes) without noticeably reducing visual quality. You can use free tools like TinyPNG or Optimizilla to manually compress JPEG/PNG images before uploading.
There are also Shopify apps (e.g. Crush.pics or TinyIMG) that automatically compress images on upload. By compressing images, you ensure they use less data so pages load faster. - Use the right file format: For most product photos or collection images, JPEG is ideal because it provides good quality at smaller file sizes. Use PNG only for images that need transparency or for graphics like logos/icons – PNG files are heavier but preserve transparency.
Avoid using BMP or TIFF as they are not web-friendly. Modern formats like WebP offer superior compression; in fact, WebP images can be ~30% smaller than equivalent JPEGs or PNGs.
Shopify helps with this by automatically serving images in WebP format to compatible browsers via its built-in image CDN. So if you upload JPEGs, Shopify might deliver them as faster WebP images to users’ browsers behind the scenes. - Optimize or replace GIFs: Animated GIFs can be extremely large and slow (even a single GIF can be several megabytes). If you use animated content, consider converting GIFs to MP4 video format or using a short video clip instead – videos are often smaller in file size for the same visual content.
Alternatively, choose a static image thumbnail instead of auto-playing an animated GIF. If a GIF is necessary, use a tool to compress it or limit its dimensions to reduce size. - Use descriptive alt text and dimensions: This doesn’t directly speed up images, but it’s a best practice to include image dimensions (width/height) in the HTML and alt text.
Specifying dimensions helps browsers layout pages faster, and alt text ensures accessibility and can slightly improve SEO (people-first content practice).
Shopify does provide some automatic image optimization – it will resize and compress images through its content delivery network. However, you should still upload reasonably sized, good-quality images to begin with.
If you have existing large images on your site, consider replacing them with optimized versions. You can identify heavy images by using your browser’s Developer Tools: inspect the Network panel and look for any image files that are very large (hundreds of KB or several MB).
Target those for optimization first. By reducing image sizes, you can often shave seconds off your page load time, especially on mobile devices or slower connections.
3. Enable Lazy Loading for Images and Media
Another powerful technique to improve perceived speed is lazy loading. Lazy loading means that images (or other media like videos) that are off-screen will not load immediately when the page opens. Instead, they load only as the user scrolls down to them. This way, the initial page load is lighter and faster because it’s not pulling in every single image at once.
For an image-heavy Shopify store, lazy loading can be a game-changer. Many Shopify themes (especially newer ones like Dawn) have lazy loading built-in for images below the fold. If your theme supports it, make sure this feature is enabled in the theme customizer or settings.
Typically, lazy loading is implemented by adding a special attribute (like loading=”lazy”) to image tags or using JavaScript libraries that handle it behind the scenes.
If your theme does not support lazy loading by default, you have a couple of options that don’t require coding from scratch:
- Use a Shopify app: There are apps (e.g. “Lazy Load” by certain developers or image optimizer apps with lazy load features) that can add lazy loading to your store without you editing code.
These apps usually insert a small script that defers offscreen images automatically. Always check reviews to choose an app that is well-regarded for performance and compatibility. - Theme code tweaks or libraries: If you are comfortable with a bit of technical work (or have someone to help), you can manually implement lazy loading. Shopify’s documentation provides guidance on adding lazy loading scripts.
A popular approach is to use the lazy-sized JavaScript library. But since our goal is improving speed without a developer, using an app or a theme that already supports lazy loading is the easier route.
The impact of lazy loading is that your initial page load will only fetch the images needed for the visible portion of the page. As the user scrolls, additional images load on-the-fly. This reduces the number of requests and bytes loaded upfront, making your site feel much snappier.
Google’s PageSpeed Insights often flags “Defer offscreen images” as a recommendation – lazy loading addresses this exact issue. By implementing it, you’ll likely see better performance scores and, more importantly, users will see your top-of-page content faster.
4. Minify and Reduce Unnecessary CSS/JS Code
Your Shopify store’s code (HTML, CSS, JavaScript) can also be optimized for speed. Minification is the process of removing unnecessary characters (like spaces, line breaks, and comments) from code files to reduce their size.
Smaller files mean quicker downloads for your visitors. The great part is Shopify already helps with this – it automatically minifies your theme’s CSS and JS files when serving them to users. This built-in optimization ensures that out-of-the-box, your store isn’t slowed by unminified core files.
However, if you or your apps have added additional code (like custom JavaScript or third-party libraries), there may still be room to optimize. Here’s how you can minimize code impact without needing deep coding skills:
- Use an app for minification: Some Shopify apps (e.g. Minifier, or the TinyIMG app’s speed tools) can scan your theme assets and minify CSS/JS with one click.
These tools create compressed versions of your files. Always backup your theme or ensure you can undo changes, just in case an automated minifier accidentally conflicts with something. - Avoid excessive custom scripts: Only add external JavaScript or CSS libraries to your site if absolutely necessary.
Each file added (for example, a carousel slider plugin or a custom font stylesheet) means an extra HTTP request and more data to download. Try to use the features built into your theme rather than adding many new plugins that come with their own files. - Combine files if possible: Reducing the number of separate files can help, since each file has some overhead. If you have multiple CSS files, combining them into one file (and similarly merging JS files) can improve loading by cutting down on round trips.
That said, combining files is a bit technical and can sometimes complicate maintenance – it’s typically done by a developer or by build tools. If you’re non-technical, you might not do this manually, but just be mindful not to overload the site with too many disparate files. - Remove unused code or apps: Old app code that’s still in your theme can bog it down. If you previously installed a Shopify app and then removed it, some leftover snippets might remain in your theme.liquid or other template files.
Shopify does not automatically remove an app’s code upon uninstalling. While this often requires editing theme code to clean up, you can reach out to the app developer for instructions – many provide guides for removing their code. Removing unused code will streamline your site’s resources.
Minifying and cleaning up code can slightly improve load times, but remember that the biggest wins usually come from optimizing media (images/videos) and limiting heavy features. So prioritize those first. Still, every little bit helps, and ensuring your site isn’t dragging along redundant code will contribute to a faster, smoother experience.
5. Limit Shopify Apps and Third-Party Scripts
One reason Shopify is so popular is the ease of extending functionality through apps – from live chat widgets to review carousels.
However, each app you add can also add weight to your site in the form of extra JavaScript, CSS, or API calls. Shopify’s documentation highlights that installed apps and third-party code are major factors in web performance. So while apps are useful, you want to be strategic in using them to keep your site lean and fast.
Here’s how to manage apps and scripts for better speed:
- Audit your installed apps: Take a look at all the apps you have in your Shopify store. Are you actively using each one, and do they provide significant value? If not, consider uninstalling apps that are not essential.
For example, if you tried out a coupon popup app months ago and it’s not really needed anymore, removing it could eliminate its script from loading on every page. - Be cautious with new apps: Before installing a new app, especially ones that add front-end features, research its impact. Check reviews or documentation to see if other users mention speed changes.
Some apps are more lightweight than others. Opt for lightweight apps known for minimal impact. Sometimes a paid app that is well-optimized can be better than a free app that’s poorly coded and slows your site. - Combine functionalities: If you find you need multiple features, see if a single app can provide several of them.
One well-built app that covers multiple needs (for example, an app that does SEO optimization and image compression and JSON-LD, etc.) could replace three separate apps, reducing the number of scripts loading. Fewer external scripts mean faster loads. - Minimize third-party widgets and tags: Aside from Shopify apps, consider any other scripts you’ve added to your theme.
Common ones include Google Analytics, Facebook Pixel, chat widgets (e.g. Tidio, WhatsApp chat), marketing tags, or embedded external content. Each of these can slow down the page if not handled properly.
Only keep the third-party scripts that are truly valuable for your business. For those you need, see if they offer a “defer” or asynchronous load option so they don’t block the main page render.
Excess apps and scripts can lead to a large number of HTTP requests that the browser must make, and increase the total download size of your pages. The result is a slower experience for users.
By trimming down to only the essentials, you strike a balance between functionality and speed. Remember, every script or app should earn its keep – if it’s not boosting your sales or user experience enough to justify the speed hit, it’s probably not worth having.
Important: When you do remove an app, follow up by checking if it left any code in your theme. As mentioned earlier, you might need to manually delete leftover snippets or ask the app developer for removal instructions. Cleaning up after an app uninstall ensures you truly get the performance benefit of removing it.
6. Use Google Tag Manager for Tracking Codes
Many Shopify store owners use various tracking codes – for example, Google Analytics, Facebook Pixel, Google Ads conversion tags, Hotjar, and more.
If you add each of these scripts individually to your theme, you end up loading multiple separate scripts which can slow down your site. A solution that doesn’t require heavy coding is to use Google Tag Manager (GTM) to consolidate and control your tracking scripts.
Google Tag Manager is a free tool by Google that allows you to manage all your “tags” (tracking codes) in one container. The big advantage is that the GTM container script loads asynchronously, meaning it doesn’t block your page from loading while it works.
You can then have GTM trigger your various tracking tags after it loads, in a streamlined way. This can reduce the impact of having multiple analytics scripts.
To use GTM in your Shopify store without a developer:
- Create a Google Tag Manager account and get a container ID.
- In Shopify, add the GTM container snippet to your theme. You can paste it into your theme’s layout (for example, in theme.liquid just below the opening <body> tag, as per Google’s instructions).
- In your GTM dashboard, add your Google Analytics, Facebook Pixel, and any other tracking codes as tags. GTM provides built-in tag templates for GA, Google Ads, etc., making it easy to set up.
- Publish your GTM container. Then remove the now-redundant individual scripts from your Shopify theme or settings, since GTM is handling them.
By doing this, you effectively load one script (GTM) instead of multiple scripts, and GTM will ensure they fire efficiently.
As a bonus, GTM lets you schedule tags, trigger them on certain pages or events, and generally manage tracking without constantly editing your theme code. For example, you can set the Facebook Pixel to only load on checkout pages if you want, etc.
Common scripts that are good to migrate into GTM include analytics and marketing tags like Google Analytics, Google Ads conversion tag, Facebook/Meta Pixel, Pinterest tag, Hotjar heatmaps, etc.
Note: Don’t put essential site functionality scripts into GTM (like jquery or theme scripts) – GTM is just for analytics/marketing tags.
Using GTM can streamline your site’s loading process. However, if you’re not comfortable doing this, it’s an optional step. The earlier tips (images, theme, apps) will have a bigger impact on baseline speed.
Think of GTM as a more advanced optimization to consider once you’ve handled the basics. Plenty of small business owners successfully set up GTM by following Google’s help guide, but if it feels intimidating, you could skip it or consult a professional for just this step.
7. Leverage Shopify’s Built-In CDN and Caching
One advantage of using Shopify is that the platform already handles many back-end performance optimizations for you. Shopify’s infrastructure is designed for speed, so make sure you’re taking full advantage of it:
- Global Content Delivery Network (CDN): Shopify stores are served through a fast, global CDN run by Cloudflare by default. This means your store’s images, scripts, and content are delivered from servers closest to your visitors, reducing latency.
You don’t need to set anything up – it’s automatic for all Shopify stores. You can verify your content is coming from the CDN by inspecting network requests (look for URLs containing cdn.shopify.com, which indicates the CDN is in use).
Since Shopify’s CDN is already optimized, you generally do not need to purchase a separate CDN service. Some advanced users might add Cloudflare for extra caching rules or protection, but for most, the built-in CDN is sufficient. - Browser caching: Shopify sets long cache lifetimes for static resources. In fact, cacheable assets on Shopify have a browser cache expiry of up to one year.
This means repeat visitors to your site will load it much faster, because elements like your logo, CSS files, or product images may be stored in their browser cache and won’t need to be downloaded again on subsequent page views.
To benefit from this, keep using Shopify’s standard asset pipeline. If you host assets elsewhere, ensure those servers have caching enabled. But if you stick with uploading images to Shopify and using the theme’s CSS/JS, Shopify’s caching will do the job. - Gzip compression and HTTP/2: Shopify automatically compresses files like CSS and JavaScript using gzip, which reduces file sizes, and serves all assets over the efficient HTTP/2 protocol.
These are technical details you don’t need to manage – just know that file compression is already taken care of, and multiple files can be downloaded in parallel thanks to HTTP/2. - Theme and app updates: Keep your theme updated to the latest version if possible, because theme developers (including Shopify for their free themes) often release performance improvements.
The same goes for apps – update them so you have any optimizations they introduced. Newer Online Store 2.0 features also allow apps to integrate more efficiently (using app blocks instead of custom code injections), which can help performance as well.
In summary, Shopify’s platform handles the heavy lifting for server-side speed. You don’t need to worry about things like finding a fast host, configuring CDNs, or enabling compression – it’s done.
By focusing on the front-end optimizations we discuss (images, theme, etc.), you’re complementing Shopify’s built-in speed benefits. This partnership of your content optimizations plus Shopify’s infrastructure will yield a fast, globally responsive store.
8. Host Videos Externally (Use YouTube, Vimeo, etc.)
Using videos on your product pages or homepage can be engaging, but videos are data-heavy. If you upload a video file directly to Shopify and autoplay it on your homepage, for example, it can dramatically slow down the page load as customers’ browsers try to fetch that large file.
A better approach is to host videos on an external platform and embed them, which offloads the bandwidth.
External video hosting (like YouTube, Vimeo, or others) means the video is served from their servers, optimized for streaming, rather than your Shopify store having to deliver it.
For instance, you can upload a product demo video to YouTube or Vimeo, then embed it in your Shopify page using the embed code. When you do this, the video content loads on-demand through the external player.
Benefits of hosting videos externally:
- Faster page loads: Initially, the page will load just a video thumbnail or embed frame, which is lightweight. The full video stream loads only when the user clicks play or scrolls to it. This defers heavy loading.
- Better streaming quality: Platforms like YouTube and Vimeo automatically adjust quality based on user’s connection, and use CDNs optimized for video. They also buffer and stream, which is more efficient than loading a whole video file at once.
- Saves Shopify storage/bandwidth: Although Shopify has unlimited bandwidth, keeping large media offsite can still reduce the load on your storefront and make it feel snappier.
To embed a video from, say, Vimeo on Shopify: upload the video to Vimeo, get the embed code (often an <iframe> snippet), and in your Shopify page or theme section, use the HTML/embed block to paste that code.
Ensure the embed code is set to be responsive so it looks good on mobile (you can use a responsive embed generator if needed).
One caution: if using YouTube, note that the YouTube player might load extra scripts (for analytics and ads). This can slightly slow the page or show unrelated suggested videos/ads at the end.
If you want a cleaner look and potentially faster performance, Vimeo or a paid video host might be preferable. Vimeo, for example, has a more minimalist player and no ads for the viewers. There are also Shopify apps that serve videos in an optimized way, but try the simple embed approach first (it’s free).
By moving videos to a third-party host, you ensure that your page itself isn’t dragging under the weight of large media files. Your customers can still enjoy rich video content, but without the long waits.
9. Fix Broken Links and Remove Dead Weight
An often-overlooked aspect of site speed and user experience is the presence of broken links or missing files. If your Shopify store is trying to load something that isn’t there (for example, a deleted image, or a script URL that is wrong), it can cause delays as the browser attempts to retrieve it and eventually times out or gets a 404 error.
Broken links also frustrate visitors who click something expecting content and get an error instead. Here’s how to ensure broken links aren’t slowing down or hurting your site:
- Scan for broken links: Use a tool like Google Search Console (which will report crawl errors for your site) or a third-party crawler like Screaming Frog.
There are also Shopify apps and Chrome extensions that can detect broken links. These tools will list any 404 errors – pages on your site that were not found. Pay attention to missing images or files too, not just page URLs. - Set up redirects for moved/deleted pages: If you find that some product page or blog post URL no longer exists (perhaps you removed a product), use Shopify’s built-in URL redirect feature to redirect the old URL to a relevant new page.
This way, both users and search engines won’t hit a dead end. It also prevents the browser from wasting time trying to load a non-existent page. - Fix internal links: Update any internal navigation or links that pointed to something that’s gone. For example, if you had a menu item linking to a collection that you removed, update or remove that menu item. Clean internal linking ensures users aren’t clicking into slow 404 error pages.
- Remove references to old apps or files: Similar to code cleanup, if your theme is referencing a file that no longer exists (maybe an old app’s script or a font file that was hosted externally), remove those references.
Each 404 request is a wasted request that can slightly slow down the page as the browser waits for a response that comes back as an error.
By fixing broken links and 404 errors, you can improve your site’s speed and user experience. As one source notes, broken links can indeed slow down your store and annoy visitors. Luckily, this is usually a straightforward fix.
Make it a habit to periodically check for broken links, especially after doing major content changes or app installs/uninstalls. Shopify’s link list and redirect tools are your friends here.
10. Regularly Monitor and Optimize (Continuous Improvement)
Website speed optimization isn’t a one-time task – it’s an ongoing process. As you add new products, install updates, or run promotions, your site’s content will change, and new slow points can creep in.
Small business owners should periodically monitor performance and do tune-ups to keep the site running fast. Here are some habits for continuous speed optimization:
- Regular speed tests: Make it a routine (say, once a month) to run your homepage and a key product page through Google PageSpeed Insights or GTmetrix. Keep a log of the scores and load times. This helps you notice if things are getting slower over time so you can intervene early.
- Set performance budgets or benchmarks: For example, you might decide “Our homepage should always load in under 3 seconds on desktop and 5 seconds on mobile for a 4G connection.”
If you see metrics exceeding those, it’s time to investigate. You could also use Shopify’s Speed Score as a benchmark – e.g., strive to stay in the green (Good) range. If the score drops significantly after adding something, that’s a flag. - Keep Shopify and apps updated: As mentioned, updates can bring performance improvements. Also watch Shopify’s announcements for any new features related to speed (for example, they might roll out improvements to their themes or coding standards).
Adopting new best practices (like upgrading to an Online Store 2.0 theme or using new image optimization features) will help long term. - Test new features before full rollout: If you plan to add a new app or a custom feature, test your site speed before and after adding it.
This can be as simple as measuring PageSpeed Insights score or load time pre-install vs. post-install. If the new feature drags your speed down a lot, you may reconsider or look for alternatives. - Get feedback from customers: Sometimes your real users will spot speed issues before you do. If customers from certain regions say your site is slow, maybe you need to check if everything is loading via the CDN properly in those regions. Use Shopify’s analytics or a survey to gauge if users feel the site is fast and responsive.
Remember that speed optimization is about balance. You want a fast site, but also one that provides a rich shopping experience.
It’s okay to have features that slightly increase load time if they genuinely boost sales or user engagement – just ensure you’ve optimized them as much as possible. By continuously monitoring and tweaking, you’ll maintain a speedy store without sacrificing functionality.
Frequently Asked Questions (FAQs)
Q1: How can I check my Shopify store’s speed?
A: You can measure your Shopify site speed using tools like Google PageSpeed Insights (for detailed performance metrics on mobile and desktop). Shopify also provides a Speed Score in your store’s admin which is based on Google’s Lighthouse analysis of your homepage and key pages.
Additionally, third-party tools such as GTmetrix or Pingdom can test your page load time. It’s a good idea to test both on desktop and mobile.
These tools will highlight areas to improve – focus on the ones relevant to Shopify (like image optimization or app scripts) and remember that some technical suggestions (like adding a CDN) are already handled by Shopify.
Q2: What is a good page load time or speed score for a Shopify e-commerce site?
A: Generally, a good target is to have your pages visibly load within 2-3 seconds for users on a typical connection. Many industry studies show significant drop-offs in engagement beyond a 3-second load time.
In terms of metrics: an ideal First Contentful Paint (FCP) under about 2 seconds on mobile is excellent, and a Time to Interactive under 5 seconds on mobile is a good aim (desktop is usually faster).
Shopify’s Speed Score (Lighthouse) ranges 0-100; scoring in the 70+ (green) range is solid, though even sites scoring 50-60 can perform fine if real user times are low. The key is to continuously improve.
If your site currently takes, say, 6 seconds to load, try to get it down to 4 seconds or less. Any improvement in speed is beneficial – there’s no single “perfect” number, but faster is always better for user experience and conversion.
Q3: Does a faster website really increase sales for my small business?
A: Yes, a faster website can have a direct positive impact on sales and conversions. Shoppers are more likely to stay and make a purchase if pages load quickly. As mentioned earlier, more than half of mobile users will abandon a site that takes over 3 seconds to load.
Also, every second counts – each additional second of loading time can cost you potential customers, with conversions dropping by an estimated ~20% per second of delay. On the flip side, by improving your page speed, you reduce bounce rates and keep users engaged.
They’ll browse more products and feel more confident in checking out, which leads to increased sales. Moreover, speed improvements can enhance your SEO slightly and make your paid ads more effective. In short, investing time in speed optimization is likely to pay off in better user satisfaction and higher revenue.
Q4: Can I really improve my Shopify site speed without coding knowledge or a developer?
A: Absolutely. The tips in this article are specifically chosen so that non-technical store owners can implement them. You don’t need to write code to compress images, switch to a faster theme, remove an app, or enable an app for lazy loading.
Shopify’s platform is very user-friendly, and many optimizations are just a matter of changing settings or using an app/plugin.
For example, selecting a lightweight theme is done through the Shopify Theme Store interface, and image optimization can be handled by user-friendly apps where you click a button to compress images.
Even something like Google Tag Manager, while a bit technical, involves copying and pasting snippets – doable if you follow instructions carefully.
The key is to take it step by step. If you’re unsure about something (like editing theme code to remove leftovers), you can reach out to Shopify support or the app developer for guidance.
But most speed improvements require little to no coding – they’re more about making smart choices (like not uploading huge images or avoiding too many apps) that anyone can do.
Q5: Will installing a speed optimization app help, or will it slow my site down further?
A: Some optimization apps can help, but you must choose them carefully. For example, an image optimization app that compresses your images can reduce load times significantly and runs mainly in the background (during upload or periodically), so it’s beneficial.
There are also apps that help with lazy loading, code minification, or removing unused CSS. However, remember that adding any app means adding at least some script to your store. A poorly made “speed booster” app could ironically add bloat or conflict with your theme.
It’s best to use apps that address specific needs (like image compression or caching) and have good reviews regarding speed improvement. Also, try to implement native or manual solutions first (e.g., Shopify now auto-lazy-loads images in many themes, and has built-in CDN and caching).
If you do use an app for speed, monitor your site speed before and after to ensure it’s having the intended effect. In summary, a reputable optimization app in a needed area can boost speed, but avoid “all-in-one” speed apps that promise magic fixes without clear explanation – stick to proven tools and always assess the trade-off of adding another app.
Q6: What does Shopify already do for speed, and what do I still need to do myself?
A: Shopify’s platform automatically handles a lot of technical performance optimizations behind the scenes. For example, Shopify uses a global Cloudflare CDN to serve your content quickly worldwide.
It also gzip-compresses your pages and files and serves them over fast HTTP/2 connections. Browser caching is set with very long expirations (up to a year) for static assets.
Images uploaded to Shopify are automatically processed through an image CDN that can resize and even convert them to WebP for better compression.
Shopify also minifies CSS/JS files on the fly. All these things mean you don’t need to worry about hiring a developer to, say, set up a CDN or compress files – it’s done.
What you need to do as the store owner is focus on the content and choices you control: use a fast theme, keep your images optimized (even with Shopify’s auto-optimizations, uploading huge images is still problematic), limit the number of apps and scripts you add, and follow best practices like lazy loading and periodically checking your site’s speed.
Think of it this way: Shopify provides a racecar engine and smooth road for performance, but you’re in charge of not overloading the car with too much weight.
By doing your part with the tips we’ve discussed, you let Shopify’s built-in speed features really shine, resulting in an exceptionally fast store.
Conclusion
Speeding up your Shopify e-commerce website is one of the best investments you can make in your business – and you can achieve significant improvements without hiring a developer.
By choosing a lightweight theme, optimizing images, reducing unnecessary apps/scripts, and leveraging the tools at your disposal, you’ll create a faster, smoother shopping experience that delights customers and drives more sales.
Importantly, these optimizations are aligned with a people-first approach: they remove friction for your visitors, which in turn boosts your store’s effectiveness and credibility (hitting those E-E-A-T marks of expertise and trustworthiness).
Remember that website performance optimization is an ongoing process. Implement the tips above step by step – you might start by compressing your images and removing one or two redundant apps, then measure the improvement.
Speed gains can compound: a second saved here and another there adds up to a much snappier site. Keep monitoring your speed, stay updated on Shopify’s new features, and continue to refine your store.
By focusing on your users’ experience and following these guidelines, you’ll not only improve your Shopify site’s speed, but also set your small business up for greater success online.
A faster site means happier shoppers, better SEO, and ultimately, a stronger bottom line. So take action today on these tips – your customers (and your sales figures) will thank you for it!