
Social Media Posting Calendar for Local Shops: A Complete Guide to Scheduling Posts
Local shops today need a strong presence on social media platforms like Facebook, Instagram, TikTok, and more to reach their community and customers. One of the best ways to stay organized and consistent is by using a Social Media Posting Calendar – essentially a content schedule that plans out what to post, where, and when.
In this comprehensive guide, we’ll explain how to create a social media posting calendar for local businesses of all types.
We’ll cover what a social media calendar is, why it’s important, and step-by-step guidance to build one that covers popular platforms (Instagram, Facebook, TikTok, Twitter/X, LinkedIn, etc.) in the U.S. We’ll also discuss automation tools and best practices for scheduling posts.
By the end, you’ll have a clear roadmap to streamline your social media content planning and social media management in a way that saves time and boosts engagement. Let’s dive in!
What Is a Social Media Posting Calendar?
A social media posting calendar (or content calendar) is a schedule that outlines all your upcoming social media posts, organized by date, time, and platform. In other words, it’s a centralized plan for what content you will publish on each of your social media channels. This calendar typically includes details such as:
- Platforms and Channels: Which social network the content will be posted on (e.g., Facebook, Instagram, TikTok, Twitter/X, LinkedIn).
- Dates and Times: When each post will go live (specific dates and optimal times for posting).
- Content Details: What the post will be – text caption, images or videos, links, hashtags, etc., and any campaign or theme it relates to.
- Responsibility: Who will create or publish the post, if you have a team (for a solo business owner, this might always be you).
- Additional Notes: Any relevant hashtags, tags, or calls-to-action, and notes like “cross-post to Instagram Story” or “boost this post” if needed.
In essence, a social media calendar is “nothing but a schedule to help you know what to do when”. It serves as a roadmap for your social media content strategy across all channels.
Instead of posting on the fly, you’ll have a clear plan that ensures you cover all your marketing goals and seasonal events. For local shops, this means you can map out posts about new products, promotions, local events, holidays, and engaging content in advance.
Benefits of Using a Social Media Content Calendar for Local Businesses
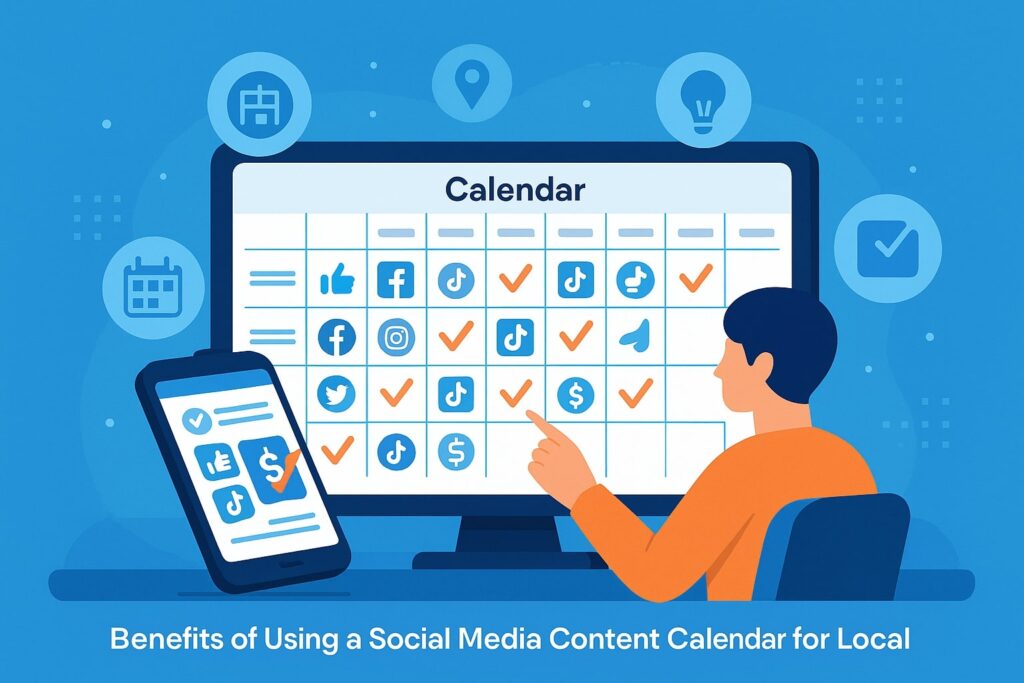
Why should a small business or local shop use a social media content calendar? There are numerous benefits, especially when resources are limited. Here are some key advantages:
- Consistency and Frequency: Regular posting is crucial to stay visible online. A content calendar helps ensure you don’t let your social profiles go “silent” for long periods.
It reminds you to post consistently (e.g., a few times per week on each platform) so that you maintain momentum with your audience and keep growing your following. Consistency is key to building an engaged audience. - Time Management and Efficiency: Planning posts ahead saves a lot of time and prevents last-minute scrambling. With a calendar, you can batch-create and schedule several posts at once, rather than interrupting your day to post something spontaneously.
This “batching” of content creation is much more efficient and prevents the social media effort from becoming a constant distraction. As the U.S.
Small Business Administration notes, even dedicating 2–3 hours per week to plan and schedule your social media updates can be a “solid social marketing effort” for a small business.
By allocating a few hours for social media on a regular schedule, you free up the rest of your time to run your business. - Strategic Planning (Alignment with Goals): A calendar forces you to think ahead about your marketing goals and campaigns.
You can align your social media posts with your business objectives – for example, planning a series of posts to promote a seasonal sale, or highlighting a new product launch.
It’s easier to execute strategic campaigns (like holiday promotions or event countdowns) when you can map them out on a calendar. This ensures your messaging is cohesive across platforms and ties into in-store or online events. - Content Variety and Quality: When you plan in advance, you can ensure a good mix of content types and topics, which keeps your audience interested. Without planning, there’s a risk you might post too many promotions in a row or forget to post engaging non-promotional content.
A calendar helps you vary your content intentionally – for example, mixing informative or entertaining posts with occasional promotional posts.
Many marketers follow the “80/20 rule” for content: roughly 80% of your social media content should be valuable or engaging to your audience (educational, entertaining, or inspirational), and only 20% should be directly promotional.
This balance keeps followers interested without overwhelming them with ads. By mapping posts on a calendar, you can clearly see if you’re following the 80/20 rule (about 4 out of 5 posts focused on audience value rather than sales). - Never Miss Key Dates: A local business can plan around important dates using a calendar. You can mark holidays (e.g. Black Friday, Small Business Saturday, Christmas, Independence Day), seasonal changes, or local community events that you want to post about.
This prevents the scenario of waking up to realize “Today is a major holiday and we didn’t prepare any post!” By identifying these dates in advance, your social media calendar ensures you always have timely content ready for events that matter to your customers. - Team Coordination: If more than one person handles social media, a shared calendar keeps everyone on the same page. It clarifies who is responsible for each post and when it’s due.
Even if you’re a solo business owner, a calendar acts as a commitment to yourself and can help you stay disciplined. If you work with contractors or employees on marketing, a content calendar is an invaluable collaboration tool so that ideas, drafts, and posting schedules are visible to all involved. - Better Engagement and Monitoring: When your posts are pre-planned and even prescheduled, you can also plan time to monitor and engage with your audience. For example, your calendar can include a daily 15-minute slot to check notifications, respond to comments or messages, and engage with customers.
Consistent engagement boosts your visibility in algorithms. Plus, having content scheduled frees you up to interact more, since you’re not busy figuring out what to post every day. - Analytics and Improvement: A calendar allows you to track and measure results over time. Because you have a record of what was posted when, and on which platform, you can correlate it with performance metrics.
Each social platform has analytics (Facebook Insights, Instagram Insights, Twitter Analytics, etc.) that show how each post did (impressions, likes, shares, comments, etc.).
By reviewing your calendar alongside these analytics, you can identify what content resonates best with your audience. For instance, you might notice that your Tuesday product tip videos get more shares than your Friday promotional posts – this insight can inform future content planning.
Setting aside even a few minutes each week to review your analytics and performance data is a good habit. Over time, these observations will help you refine your posting schedule (e.g., maybe you find your audience engages more on certain days/times) and content strategy.
In short, the calendar plus analytics help you measure and adjust your social media strategy for better results.
By mapping out your social media presence in advance, you avoid the stress of last-minute posting and ensure a balanced, goal-oriented content mix. In the next section, we’ll walk through how to create a social media posting calendar step by step.
How to Create a Social Media Posting Calendar (Step by Step)
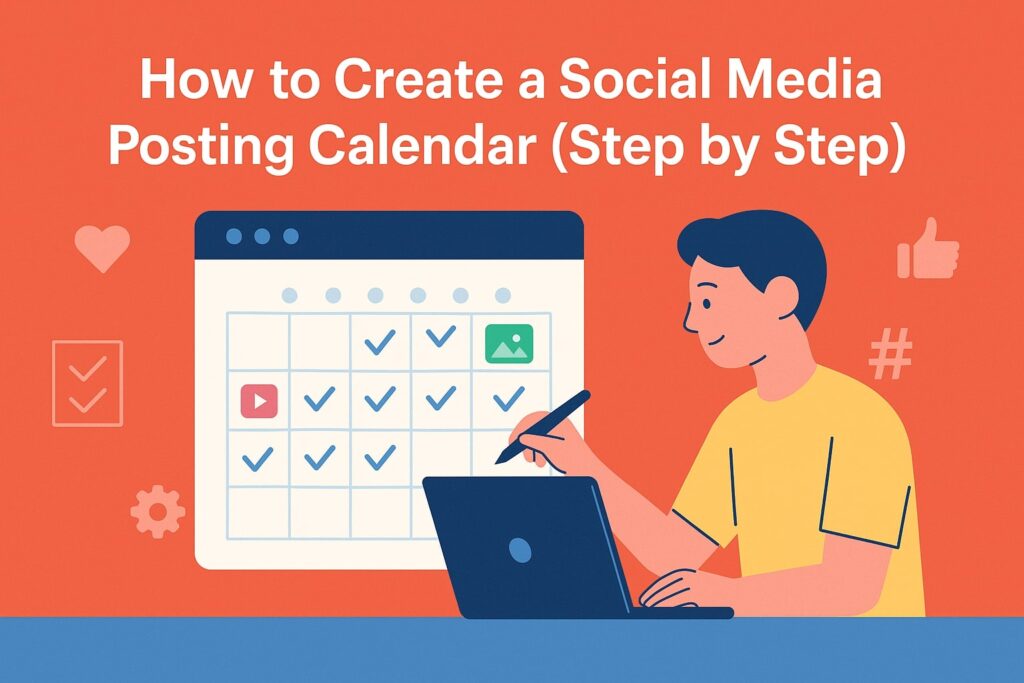
Creating a social media posting calendar for your local shop might seem daunting at first, but it’s quite manageable if you break it into steps. Below is a step-by-step guide applicable to any business type – whether you run a boutique retail store, a restaurant, a salon, a service business, or any local enterprise.
The key is to tailor the calendar to your specific needs while following general best practices for content scheduling and planning.
1. Define Your Goals and Audience
Start by clarifying what you want to achieve with your social media and who your target audience is. Your goals will shape your content and posting schedule:
- Set Clear Objectives: Are you aiming to increase brand awareness in your community? Drive foot traffic to your store? Promote an online shop or generate leads? Perhaps you want to showcase your expertise or improve customer service.
Define a few key objectives (e.g., “Increase engagement by 20%,” “Drive 50 visits to store for our spring sale,” or “Grow Instagram followers to 1,000”). Common goals for local businesses include building community engagement, attracting new local customers, and keeping existing customers informed. - Know Your Audience: Think about your typical customer and what content they find appealing. The tone and type of content will differ if your audience is teens on TikTok vs. professionals on LinkedIn, for example.
Consider factors like age, interests, and online behavior of your local customer base. If you’re not sure, look at your current followers’ demographics (many platforms provide insights into age range, location, etc.) and consider feedback from customers.
Understanding what your audience cares about helps you tailor your content to their preferences – for instance, a family-owned café might find their audience loves posts about daily specials and behind-the-scenes bakery videos, while a local gym’s audience might engage more with workout tip videos and member success stories.
Your goals and audience understanding will serve as the foundation of your content calendar. Every post you plan should in some way serve your objectives or appeal to your target followers. If a planned piece of content doesn’t align with either, reconsider if it’s worth including.
2. Choose Your Social Media Platforms
You do not need to be active on every social media platform – it’s better to focus on the platforms that make sense for your business and where your audience is most active. Assess which channels are most relevant:
- Facebook: Nearly all local businesses benefit from a Facebook presence. It’s great for reaching a broad local audience (many community members, often adults 25+, regularly use Facebook).
Facebook is ideal for sharing updates, events, photos, and engaging with local community groups. If your shop hosts events or promotions, Facebook’s event feature and local group posting can amplify visibility. - Instagram: Perfect for businesses that can showcase visual content (food, fashion, decor, lifestyle, etc.). Instagram’s audience skews a bit younger than Facebook.
Use it to share high-quality photos, short videos (Reels), and Stories of your products, store, and customers. It’s a powerful platform for building brand personality and engaging through visuals. Retail and food businesses, in particular, find Instagram very effective. - TikTok: If you want to reach a younger audience or create fun, creative video content, TikTok is worth considering. TikTok is all about short, entertaining videos – you might show off new products, do quick how-to’s, participate in trending challenges, or share behind-the-scenes glimpses of your shop.
Some local businesses have gone viral on TikTok by adding a local twist to trends or showcasing their unique offerings. Keep in mind TikTok can require frequent content to gain traction, so ensure you have the creativity and time for it. - Twitter (X): Twitter (now rebranded as X) is a fast-moving platform good for real-time updates and quick interactions. Local shops might use Twitter to share news bites (e.g., “Fresh pastries just out of the oven!” for a bakery), daily specials, or to engage with local customers and influencers (like a local journalist or blogger).
It’s also useful for customer service (quickly answering questions). However, Twitter’s user base is smaller than Facebook/Instagram and skews towards news and tech-savvy audiences. Use it if your community is active there or if real-time communication is part of your strategy. - LinkedIn: Primarily a professional network. A local B2C shop might not prioritize LinkedIn, but if you are a B2B business or you offer professional services (consulting, etc.), LinkedIn is useful.
Some local businesses (like a marketing agency, or a craft shop offering business workshops) could use LinkedIn to share industry tips, business milestones, or networking event info.
In general, LinkedIn is more formal; content can include company news, employee spotlights, or thought leadership relevant to your field. - Pinterest: If your business is visual or DIY-friendly (think craft stores, fashion boutiques, bakeries, interior design, etc.), Pinterest can drive interest and even website traffic.
You can create boards for your products or ideas (e.g., a local plant nursery might pin gardening tips and beautiful plant images linking back to their site).
Pinterest users often look for inspiration and how-tos, so tailor content accordingly (like “recipe of the week” for a bakery, or “home decor ideas” for a furniture store). - YouTube: For longer videos or tutorials, YouTube could be a platform to consider. For example, a local hardware store could post DIY project videos. However, YouTube content requires more production effort.
The good news is you can share YouTube videos on your other platforms and embed them on your website. If video is central to your content strategy and you can invest in it, YouTube can be powerful (and YouTube is also a search engine for how-to content). - Nextdoor: As a hyper-local network, Nextdoor can be useful to reach people in specific neighborhoods. It’s more of a community bulletin board. A local shop can post updates or deals on Nextdoor to ensure nearby residents see them.
While not a traditional content calendar platform, consider including major Nextdoor posts in your schedule if you use it (e.g., a monthly update or special offer posting). - Google Business Profile (Google My Business): While not a typical “social network,” your Google Business Profile allows you to post updates (offers, events, product highlights) that show up on your Google listing.
This is very important for local search visibility. You might include a plan to post on Google (e.g., weekly or for key promotions) as part of your calendar. Posts here can help attract searchers looking at your business on Google Maps or Search.
Choose 2–4 platforms to focus on initially, based on where your target customers spend their time. It’s better to be consistently active on a couple of key platforms than to stretch yourself thin on every platform out there.
For most local shops, Facebook and Instagram are a common duo to start with; others add TikTok or Twitter if relevant. If you have a very youth-oriented business, you might prioritize TikTok and Instagram. If you’re B2B, LinkedIn might pair with Facebook. Make the choice that fits your situation.
Finally, remember each platform has its own style and content types. For example, Instagram and Pinterest are visual; Twitter is text-heavy; TikTok and YouTube are video-centric. Tailor your content for each rather than simply cross-posting the exact same thing everywhere.
Your calendar can note the format for each platform (e.g., an idea might be a text post on Facebook, a quick video on TikTok, and a photo on Instagram – all on the same theme).
3. Mark Key Dates, Events, and Campaigns
Now that you know your goals and platforms, map out the important dates and events for your business and community. Pull up a calendar (physical or digital) for the year (or at least the next 3–6 months) and mark these items:
- Holidays and Seasons: Note major holidays (New Year’s, Valentine’s Day, Easter, Independence Day, Halloween, Thanksgiving, Christmas, etc.) as well as any seasonal transitions (spring, summer, back-to-school) relevant to your business.
Most businesses will want social media content that ties into big holidays (even if just a greeting to customers or a special sale). Seasonal content (like “summer specials” or “winter tips”) is also engaging and timely. - Local Events: Consider events in your town/city or neighborhood – parades, festivals, fairs, community gatherings, local sports events, etc. Local shops can shine by engaging with community events.
For example, if there’s an annual town festival, you might plan posts counting down to it or showing your participation. If there’s a local farmers market or art walk you’re part of, include that. - Business Events & Promotions: Mark your own sales, promotions, product launches, or events. This could be an anniversary sale, a new collection arrival date, a store anniversary, a customer appreciation day, workshops or classes you host, etc.
For each of these, you may want multiple social posts (e.g., a “save the date” announcement, a reminder as it approaches, and live updates or thank-yous during/after the event). - Hashtag Holidays or Observances: There are a lot of fun social media “holidays” (like National Coffee Day, Small Business Saturday, National Pet Day, etc.). Identify a few that resonate with your brand or audience.
For a local pet supply store, for instance, National Pet Day would be great to post a customer’s pet photo. A bookstore might mark World Book Day. Don’t overdo these, but sprinkling in relevant ones can add personality.
There are online lists of social media holidays by date; pick those that make sense for you. - Recurring Themes: If you plan to do any recurring weekly or monthly themes, note those. For example, a lot of businesses do something like “Tip Tuesday” or “Throwback Thursday (#TBT)” or “Feature Friday” (highlighting a product or a customer).
If you want to have a regular cadence like every Monday you share a motivational quote, mark that pattern on your calendar.
Once you have all key dates down, you have the skeleton of your content calendar. You know when you must have posts (because something is happening that day). Around these, you will fill in other content to keep a steady presence.
4. Brainstorm Content Ideas and Categories
With key dates in mind, start brainstorming content ideas for your posts. At this stage, think broadly about different categories or types of content you want to share regularly. Variety is important – as mentioned, you want a good mix to keep your feed interesting.
Here are some content categories and ideas that many local businesses can utilize:
- Product or Service Highlights: Posts that showcase what you sell or the services you offer. This can be a single product spotlight (with a nice photo and description), a new arrival, a demo of a service, or a menu item if you’re a restaurant. Spread these out so it’s not all product promotion all the time.
- Educational or Tip Posts: Share your expertise in a way that benefits followers. For example, a local hardware store could post DIY tips, a bakery could share a baking tip or recipe snippet, and a salon could give hair care advice for the season.
This establishes you as a helpful expert and not just there to sell. “How-to” content and quick tips often get good engagement. - Entertaining or Inspirational Content: Things like quotes, memes (if appropriate for your brand voice), or inspirational stories can humanize your business.
For example, motivational Monday quotes for a fitness center, or a funny comic about coffee for a café. Ensure any humor or quotes align with your brand values. - Behind-the-Scenes: People love to see the humans and processes behind a local business. Consider posts that show your team at work, preparations for an event, a peek into how a product is made, or even a quick tour of your shop. Behind-the-scenes content builds a personal connection and authenticity.
- Customer Features and Testimonials: Highlight your customers! You could share a customer testimonial or review (with permission), a user-generated photo (e.g., a customer wearing an item they bought from your boutique), or simply thank a “Customer of the Week”. This not only flatters those featured but also provides social proof to others.
- Community and Local Culture: As a local shop, leverage the local angle. Post about community news that’s relevant, partner with other local businesses for shout-outs, or share photos from around town.
Did the local high school team win a championship? Congratulate them in a post. Is there a charity drive you support? Promote it. Being engaged in local happenings shows you’re a community player, not just a business. - Promotions and Sales: Of course, include your promotional content – sales, discount codes, limited-time offers, new loyalty program announcements, etc. These are your 20% “ask” posts (as per the 80/20 rule).
Make sure these posts have clear calls-to-action (like “Visit us this weekend for 20% off!”). Also, consider boosting these with ad spend if appropriate, since organic reach for promotional posts can be lower. - Holidays & Greetings: Plan simple holiday greeting posts (a “Happy New Year!” graphic or a heartfelt Thanksgiving note from your team). These show the human side of your business. They might not drive sales directly, but they remind people you’re celebrating along with the community.
- Interactive Posts: Think of occasional posts that prompt engagement. For example, polls (Twitter and Instagram Stories allow polls), questions (“What’s your favorite item from our summer menu?
Tell us in the comments!”), contests or giveaways (“Comment and share to win a gift card”). Interactive posts can spike engagement and make your page more lively. Just schedule them thoughtfully (and ensure you can follow through, e.g., picking a winner for a contest).
A good practice is to list out 5–7 content categories (like the bullet list above) that make sense for you, and then make sure your calendar rotates through these categories. This prevents you from getting stuck in one type of content.
Using a content mix keeps your feed dynamic and caters to different audience interests. For instance, if you post a heavy promotional message today, maybe tomorrow’s planned post is something purely fun or informative.
Tip: Maintain a running idea bank. As you brainstorm, you might think of specific post ideas (e.g., “Post idea: Short video of us prepping for spring window display – use as a Reel”). Jot these down in a separate ideas document or sheet.
You won’t use all ideas immediately, but having an inventory makes filling the calendar easier. You can also reuse or repurpose successful content – a content calendar helps spot opportunities to repurpose popular posts later on instead of reinventing the wheel each time.
5. Determine Posting Frequency and Timing for Each Platform
Next, decide how often you will post on each selected platform. Your posting frequency should strike a balance – be consistent but not overwhelming. The “right” frequency can vary by platform and business, but here are some general guidelines based on research and expert recommendations:
- Facebook: Aim for around 1 post per day, or at least 3-5 posts per week on Facebook for a local business. Many experts suggest 5-7 posts per week is a good frequency for Facebook to stay on audience feeds without spamming.
Quality matters more than quantity, so if daily is too much to sustain, a consistent 3-4 times a week can work. The best times to post on Facebook (generally) tend to be mid-mornings or around noon during weekdays (Monday through Thursday ~10am-1pm often sees high engagement), but you should adjust based on when your followers are online (Facebook Insights can tell you that). - Instagram: Aim for 3-5 posts per week on the Instagram feed. If possible, posting every other day or so is great for maintaining visibility. You can supplement feed posts with more frequent Stories (Instagram’s CEO suggests around 2 Stories per day for active engagement).
Posting regularly on Instagram increases your chances of appearing in the Explore page or in searches. But remember to mix up content types – use photos, carousel albums, and Reels to keep things fresh.
If you cannot post that often, focus on making each post high quality; even 2 good posts a week is better than 5 poor ones, especially if you’re a small team. - Twitter (X): Twitter moves fast, so 2-3 tweets per day is a common recommendation for an active presence. That might sound like a lot, but tweets can be short and you can include retweets or replies as part of that activity.
Many businesses tweet 10-20 times per week on average. For a local shop, you might start with at least one update per day and build from there if you have more to say (e.g., morning announcement and afternoon follow-up).
Experiment and see what engagement you get; you likely won’t overwhelm Twitter followers by posting multiple times because of its real-time nature. - TikTok: Consistency is key on TikTok’s algorithm. Aim for about 3-5 TikToks per week as a starting point. TikTok itself has mentioned that posting 1-4 times per day can help growth, but that’s a high bar for a small business.
If you can do more and have ideas, great – but ensure each video has some value (trend, humor, or info). With TikTok, even a few posts a week can help you stay on people’s feeds, and you can adjust based on what content performs well.
Monitor your TikTok analytics to see when your followers are online; many small businesses find posting in the late afternoon or early evening catches people after school/work (Sprout Social notes TikTok engagement often peaks from noon to early evening). - LinkedIn: Posting 1-2 times per week might be enough for LinkedIn, but you can go up to 1 time per day on weekdays if you have a professional audience. LinkedIn’s feed is not as real-time as others, so each post has a bit more longevity.
Focus on weekdays and business hours for posting times (midday is often when LinkedIn engagement spikes). - Pinterest: Pinterest is more search/discovery oriented. You can pin content less frequently; at least 1 post (pin) per week is recommended to keep your profile active.
Some retailers pin multiple items or blog posts per week if they have a lot of content. Make sure to use good descriptions and links for each pin to drive traffic to your site. - Google Business Profile: As noted, try to post at least once per week on your Google Business Profile. These posts expire after a week or so in visibility, hence a weekly refresh keeps your Google listing fresh.
Posts can be short and can reuse content from your other platforms (e.g., an offer you posted on Facebook can also be a Google post).
These frequencies are generalized. It’s okay to adjust based on your capacity – just stay consistent. If you commit to 3 Instagram posts a week, stick to that routine so your followers know you’re active.
You can increase frequency over time if you see positive results and have more content, but don’t burn out by over-committing early. Remember the advice: “Quality should always come before quantity… If your team can’t post daily, aim for every other day – three quality posts are worth more than five low-quality posts.”.
Regarding post timing (what time of day to post): studies often show late mornings to early afternoons on weekdays as strong times for many platforms. For example, Facebook and Instagram often see high engagement mid-morning, LinkedIn around lunchtime, and TikTok later in the day.
However, these are averages. Use your own page insights to see when your followers are online most. A good strategy is to start with known “good” time windows (like lunchtime or early evening) and then adjust if you notice different patterns for your audience.
The beauty of scheduling tools (discussed later) is that you can set posts to go live at optimal times even if you’re not free then.
6. Choose a Calendar Format or Tool
Now it’s time to actually organize the information into a calendar format. You have your dates and content ideas – you need a place to lay them out clearly. There are a few approaches to creating the calendar itself:
- Spreadsheet (Excel or Google Sheets): This is a simple and free method. You can create columns for Date, Platform, Content (caption), Image/Media, and any other notes. Then fill each row as a planned post.
Many free social media calendar templates are basically spreadsheets with color coding. A spreadsheet offers flexibility – you can sort, color-code by platform or campaign, and easily adjust.
If you prefer something highly customizable and you’re comfortable with Excel/Sheets, this is a great option. It’s also easy to share with a team via Google Sheets.
(One downside: it’s manual, and you’ll have to copy-paste content into your social accounts or scheduler later, but it’s a good planning tool.) - Calendar Apps (Google Calendar, Outlook): Some small business owners actually use a regular calendar app to block out posting schedules.
For example, you can create a dedicated Google Calendar for social media and create events like “Post on Facebook: Topic XYZ” at 10am on certain days. This is a visual approach and allows you to see the spread of posts over weeks.
You can set reminders for yourself via the app. Google Calendar is free and easy, and you might integrate it with personal/work calendars to ensure you don’t double-book your time.
It may be less detailed (as you might not write the full caption in the calendar event), but it’s effective for scheduling dedicated time slots for content (e.g., an hour every Monday to schedule out that week’s posts). - Project Management or Note Tools (Trello, Asana, Notion): Some people use Kanban boards or content planner templates in tools like Trello or Notion.
For instance, Trello can have columns for each day of the week or each platform, and cards for each post that you drag onto a calendar view.
This can be very visual and good for collaboration, though it may be a bit advanced if you’re new to these platforms. If you already use one for your business, consider it. - Dedicated Social Media Management Tools: There are many tools specifically made for social media scheduling and content calendars (we’ll cover them in the next section). These often have a calendar interface where you can plan posts on a calendar and also schedule them to auto-post.
Examples include Hootsuite, Buffer, Later, Sprout Social, CoSchedule, Planable, Loomly, etc. These tools can save time because they combine planning and publishing.
However, they often come with a cost (though some have free plans or trials) and a learning curve. If you’re managing multiple platforms and can afford a small monthly fee, these can be worth it for the convenience.
When creating your calendar, ensure it includes all the key info you need. A recommended approach is to have a row or entry for each planned post with at least:
- Date & Time of posting.
- Platform (Facebook, Instagram, etc).
- Content Caption/Text (or an outline of it).
- Visuals needed (e.g., “Image of product X” or file name/link to the image).
- Hashtags or Tags to include (if applicable).
- Category/Campaign (maybe a column to mark if it’s part of “BackToSchool campaign” or “Tip of the Week”, etc., for tracking purposes).
- Owner (if you have multiple people, indicate who’s responsible for creating or publishing the post).
Make the format as simple or detailed as you need. If you’re a one-person operation, a basic sheet with date/platform/content might suffice. If you have a team, you might need more columns (like a status: drafted, approved, scheduled, posted). The goal is that at a glance, you can see what’s lined up for the week or month across all platforms.
Also, consider the cadence: Some businesses plan a month ahead, others a week or two at a time. It’s often good to plan at least 2–4 weeks of content in advance, but also leave room to add timely content.
Your calendar should be a living document – you can adjust it as needed. For example, if a big unexpected local news or viral trend comes up that relates to your business, you might slot in a new post (and perhaps move another to later). Flexibility is important; the calendar is there to serve you, not box you in entirely.
7. Schedule and Automate Your Posts
With your posts planned on the calendar, you can move to the scheduling phase. Scheduling means using tools to set posts to publish automatically at the times you’ve planned, rather than posting manually in real-time.
Automation is a lifesaver for busy business owners – it allows you to prepare posts in batches and have them go live at optimal times without you being at the computer/phone.
Here’s how to proceed with scheduling:
- Use Social Media Scheduling Tools: There are many popular tools that let you connect your social accounts and schedule content in advance. For example, Hootsuite is one such tool that many small businesses use to schedule posts to multiple platforms at once.
Others include Buffer, Later, Sprout Social, SocialPilot, Loomly, Planable, AgoraPulse, and Post Planner among others. These tools generally offer a calendar view where you can drop your content, attach images/videos, and set the date/time for each platform. You can often schedule Facebook, Instagram, Twitter, LinkedIn, Pinterest, and more from one dashboard.
Each tool has its own interface and features (for instance, some specialize in certain platforms, like Tailwind is great for scheduling Pinterest and Instagram content). Many have free tiers with limitations (like number of scheduled posts or accounts) and paid plans for more capacity. - Take Advantage of Native Scheduling: If you don’t want to invest in a third-party tool immediately, you can use free scheduling features provided by some platforms themselves. For example, Facebook and Instagram can be scheduled for free using Facebook’s Creator Studio / Business Suite.
This is an official tool where you can create posts for FB and IG and schedule them ahead of time (including Instagram Stories now). For Twitter (X), there’s TweetDeck, a free web tool that allows you to schedule tweets and manage your Twitter feed.
Tools like these are cost-effective – they just might require you to manage each platform separately (as opposed to one unified dashboard). Also, Pinterest has a native scheduler for pins, and LinkedIn now allows scheduling posts directly on their platform as well (a newer feature). Using these can cover the basics without additional cost. - Scheduling Process: Dedicate time, perhaps once a week, to schedule the upcoming posts. For example, some business owners set aside an hour every Monday to queue up all their posts for the week across platforms. Others might plan a whole month and schedule it.
When scheduling, double-check that everything is correct – caption text, any links (ensure they work), tags, and that the correct image is attached for each platform. It’s easy to make a mistake when scheduling in bulk, so a quick review helps.
Also, stagger the times a bit so that if you’re posting to multiple platforms in one day, they’re not all at the exact same moment (unless it’s a simultaneous announcement). You might have a Facebook post at 10:00, Instagram at 10:15, Twitter at 10:30, for instance, or even different days, depending on strategy. - Maintain Some Flexibility: While automation is great, avoid a “set it and forget it” approach entirely. Keep an eye on scheduled posts, especially if external circumstances change.
For example, if you have a light-hearted joke post queued up but then some serious local event occurs that day, you might want to pause or reschedule that post out of sensitivity. Most scheduling tools allow you to edit or cancel before posting. So, regularly glance at your queue.
Using tools to schedule will save you a lot of time and help you hit those optimal post times. One expert emphasizes that batching and scheduling content in advance can dramatically improve efficiency, as “interrupting your day to think of what to write and post a single update is very inefficient”.
By planning ahead, you free yourself from constant worry about posting, and you can focus more on interacting with your audience and running your business.
(We’ll provide more details on specific automation tools and best practices in the next section, including a list of popular schedulers and their features.)
8. Monitor Engagement and Adjust Your Calendar
Posting your content is not the final step – monitoring and adapting is an ongoing part of social media success. Here’s how to manage this:
- Engage with Your Audience: After your posts go live (and even in between), make sure to check your notifications and engage with any comments or messages. Social media is a two-way street; the algorithm also rewards engagement.
Set aside a regular short time slot each day (even 10-15 minutes) to respond to comments, answer questions, and thank people for shares.
As suggested earlier, some businesses literally put this engagement time into their calendar as a reminder. Timely responses (within a day ideally) also improve your customer service image. - Track Analytics: Use the analytics/insights on each platform to see how your posts are performing. Key metrics include reach (how many saw it), engagements (likes, comments, shares, saves), clicks (if there’s a link), and possibly conversions (if trackable).
Identify top-performing posts each month. For example, maybe you notice your video posts on Instagram get twice the engagement of photo posts, or that Facebook posts with customer testimonials get a lot of shares.
These insights are gold – they show you what content resonates with your audience. Also look at under-performing posts to learn what type of content or timing might not be working. - Optimize Posting Times and Frequency: Over time, adjust your schedule based on data. If analytics show most of your Facebook fans are online at 7pm, you might shift some posts to evenings.
If you find that you lose followers when you post too often, dial back. Conversely, if you’re getting consistent engagement, you could try increasing frequency slightly. Always prioritize quality and relevance of content, but use data to fine-tune the timing and number of posts. - Adjust Content Strategy: Use what you learn to adjust upcoming content in your calendar. Did a certain topic or format go viral or perform well? Plan more of that kind of content. Did a certain promotion flop? Perhaps try a different approach next time (or the timing wasn’t right). Keep an iterative mindset – your calendar isn’t static. It should evolve with feedback from your audience and any changes in your business.
- Stay Updated on Trends: Social media is always changing – new features, new trends, even new platforms can emerge (e.g., recently Threads by Instagram launched, etc.). While you don’t need to chase every trend, be aware of major shifts.
For instance, if a certain hashtag or meme is trending in your city and it’s lighthearted, you might jump on it spontaneously (even if it wasn’t on your calendar originally). Allow some room in your schedule for real-time marketing – those unplanned posts that capitalize on current buzz. They can often get high engagement due to timeliness. - Review and Refresh Your Calendar Regularly: Every month (or quarter), do a mini review of your overall content calendar. Make sure upcoming plans still align with business goals and adjust for any new promotions or changes in your business.
Also, ensure you have variety and the 80/20 balance maintained over the long term. This review is also a chance to incorporate any new content ideas you’ve thought of or collected. It’s a continuous improvement cycle: Plan → Post → Analyze → Refine (and back to Plan).
By actively monitoring and tweaking your approach, your social media posting calendar will only get more effective over time. You’ll start to learn exactly what your local audience loves and when they are most responsive, allowing you to refine your scheduling for maximum impact.
Platform-Specific Posting Tips for Popular Social Networks
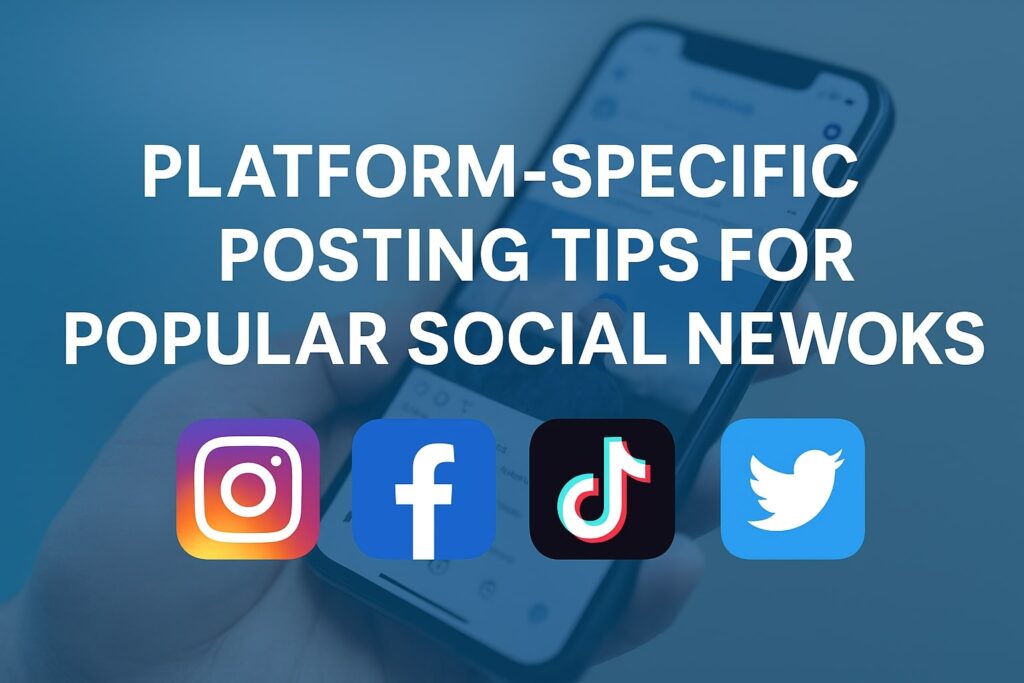
Each social media platform has its own quirks, best practices, and content styles. While we’ve touched on some in choosing platforms and frequency, let’s summarize key tips for using your social media calendar on a few major platforms popular in the U.S. This will help you tailor your content and scheduling for each:
Table 1: Platform-Specific Guidelines for Content and Frequency (for a typical small/local business)
| Platform | Recommended Posting Frequency | Content Focus & Tips for Local Shops |
|---|---|---|
| ~1–2 times per day (5–7 posts/week) | Mix of posts: product photos, local events, promotions, customer testimonials. Use Facebook’s event feature for events and Facebook Groups for community engagement. Native scheduling via Meta Business Suite is available. | |
| ~3–5 times per week (Feed posts) | Highly visual content: high-quality photos, carousel images, and short videos (Reels). Showcase products, behind-the-scenes moments, and customer stories. Utilize Stories daily (e.g., 2 per day for engagement). Consistent aesthetic and relevant hashtags (local hashtags too) help reach more users. | |
| Twitter (X) | ~2–3 times per day | Short, timely updates and conversations. Share quick news, daily specials, or tips. Engage with local hashtags or trending topics (when relevant). Great for real-time updates (e.g., “We have fresh bread out of the oven now!”) and customer interactions. Use TweetDeck to schedule tweets and monitor mentions. |
| TikTok | ~3–5 times per week | Create fun, engaging short videos (15-60 seconds). Show your business personality – try trending challenges, how-it’s-made videos, employee spotlights, or customer reactions. Authentic, casual content works well. Aim to post consistently; posting more often (even daily) can boost visibility if quality is maintained. Leverage popular sounds/trends in a way that fits your brand. |
| ~1–2 times per week (or up to daily on weekdays) | Professional and community-focused content. Share business milestones, industry tips, or community involvement (e.g., “Proud to sponsor local charity 5K”). Useful for B2B or networking. Keep tone professional yet personable. Posting during business hours (midday) on weekdays yields best results. | |
| ~1+ times per week | Post product images, infographics, or idea boards that link back to your site. Focus on aspirational or useful content (DIY tutorials, style inspiration, recipes if applicable). Organize pins into themed boards (seasonal ideas, product categories, etc.). Consistency helps – fresh pins weekly keep your content discoverable. | |
| Google Business Profile | ~1 time per week | Post updates directly to your Google listing. Ideal for announcing events, offers, or new products. Keep it brief (100-300 words and a photo). These posts improve your local SEO and give timely info to people finding your business on Google Maps/Search. Aim to update weekly so there’s always a recent post visible. |
Table 1: Recommended posting frequency and content tips for major platforms, based on expert guidelines and 2025 data. Frequencies can be adjusted to fit the business’s capacity, but consistency is key. Local businesses should focus on content that highlights their products, personality, and community.
As shown above, each platform serves a slightly different purpose and audience. By planning content tailored to each, your social media calendar will effectively engage followers on each channel.
For instance, you might plan a single campaign (say a Spring Sale) and in your calendar have: a Facebook event and photo post, an Instagram Reel showing new spring items, a Tweet about the sale’s last day, a TikTok with a funny spring theme, and a Google post announcing the sale details. The messaging is consistent, but each is adapted to platform norms.
Remember, these are guidelines – if you find your capacity only allows, say, 3 Facebook posts a week instead of 7, that’s fine. Do what you can consistently do well. It’s better to have a slightly lower frequency but high-quality, engaging posts, than to force too many low-effort posts. Quality and consistency together lead to growth.
Automating Your Social Media Calendar: Tools and Best Practices
One of the biggest advantages of having a social media posting calendar is the ability to automate your content posting. Automation ensures that your carefully planned posts actually get published at the right times, even if you’re busy running your shop or taking a much-needed break.
Here we’ll list some top tools for scheduling posts and cover best practices when using automation for social media.
Popular Social Media Scheduling Tools (2025)
There are dozens of social media management tools, but here are some that are well-regarded and useful for small businesses:
- Hootsuite: A veteran social media management platform. Hootsuite allows you to connect multiple social accounts (Facebook, Instagram, Twitter, LinkedIn, YouTube, etc.) and schedule content to all of them from one dashboard.
It offers a calendar view, bulk scheduling, and even social listening streams (so you can monitor mentions or keywords). Hootsuite also provides analytics reports. It’s great for managing several platforms at once and team collaboration (if you have multiple users).
They have paid plans, but have offered limited free plans historically (currently, Hootsuite’s free tier is quite restricted). Hootsuite is noted for robust features, though some find it a bit complex if you only need basic scheduling. - Buffer: Buffer is known for its simplicity and clean interface. It’s very easy to use – you create a queue of posts for each account and Buffer will publish them at the times you set (or you can use their suggested times).
It supports major platforms (including Facebook, IG, Twitter, LinkedIn, Pinterest). Buffer’s free plan allows a limited number of scheduled posts per account (e.g., 10 posts in queue), which is often enough to schedule a week or two ahead for a small business.
It’s a good starter tool if you want something straightforward. Buffer also has link shortening and basic analytics. - Later: This tool started focusing on Instagram scheduling and is very popular for Instagram and Pinterest, though it also supports Facebook, Twitter, TikTok, and LinkedIn now.
Later has a great visual calendar, and it’s especially handy for planning Instagram visually (you can preview your grid layout). It also helps you save hashtag groups, first comments, etc., for IG.
The free plan is limited to a certain number of posts, but paid plans are relatively affordable. If Instagram is a key channel for you, later might be a top choice. - Sprout Social: A more premium tool known for its powerful analytics and team features. Sprout allows scheduling across many networks and has a Smart Queue that can optimize send times.
It also integrates customer messages from different platforms. It’s likely more than a very small business needs (and its pricing is higher-end), but some businesses invest in it for the insights and unified inbox. - SocialPilot, AgoraPulse, Loomly, Planable: These are all solid alternatives with various strengths. SocialPilot is often praised for being cost-effective for agencies or businesses with many accounts.
AgoraPulse offers a unified inbox and good reporting, useful if you get many messages/comments to manage. Loomly is good for collaboration and giving post ideas; it’s often cited as a tool for teams to brainstorm and approve content.
Planable emphasizes smooth team workflow and content review/approval processes – useful if you have a marketing team or an external agency creating posts.
Each of these has subscription plans; for a single local shop, they might not all be necessary, but if you have specific needs (like a lot of collaboration or specific platform focus), one might fit well. - Post Planner: Mentioned in some 2025 rankings as an affordable scheduler with content curation features. It’s designed to help find viral content and recycle your top posts easily.
Post Planner supports all major networks (including Google Business) and is touted as budget-friendly for small businesses, with plans starting low. It could be an interesting tool if you need help coming up with content, as it has an ideas engine and even some AI assistance for writing posts. - Tailwind: If Pinterest is a big channel for you, Tailwind is the go-to scheduler for Pinterest and also works for Instagram. It can schedule pins in bulk and has the “Tailwind Communities” feature for sharing content among like-minded creators. It provides suggestions for the best times to pin.
- Meta Business Suite (Facebook/Instagram): We should reiterate the free tool from Meta: if you link your Facebook Page and Instagram account, you can use Meta Business Suite (formerly known as Facebook Creator Studio) to schedule posts, Stories, and even ads for FB and IG – all free. It’s a bit less intuitive than some paid tools, but it’s quite capable and ensures you’re using native features.
For many local shops who mainly use Facebook and Instagram, this might be all you need to handle scheduling. - TweetDeck or X Pro: For Twitter, TweetDeck (now sometimes referred to as X Pro) remains a powerful free tool. You can schedule tweets, create columns to monitor certain hashtags or lists (like local news, etc.), and manage multiple accounts. It’s excellent for real-time monitoring while also planning content.
When choosing a tool, consider your budget, how many platforms you use, and whether you need team collaboration. You might try a couple (many offer free trials) to see which interface you prefer. The key is that the tool should make your life easier, not more complicated.
Best Practices for Using Scheduling Tools
Using automation tools effectively involves more than just loading posts and forgetting about them. Keep these best practices in mind:
- Maintain Authenticity: Automated posts should still feel genuine. Write captions in your natural voice and avoid too much robotic repetition.
Also be cautious about auto-reply or auto-comment features (some tools allow automated DMs or responses – use sparingly, as people can tell if it’s not personal). The goal is to save time on the mechanics, but you still want your brand’s personality to shine through. - Tailor Posts to Platform: Most tools let you customize the post for each platform even if you schedule them together. Take that extra minute to tweak the wording or image format for each network.
For example, on Twitter you might use a couple hashtags and a shorter text vs. on Facebook a longer caption with a Facebook event link. Or on Instagram, maybe add a location tag or different crop for the image.
Avoid the temptation to blast exactly the same content everywhere without adjustments – a little tailoring improves results (and looks less like automated cross-posting). - Use Content Categories/Queues: Some tools like Buffer, Post Planner, or MeetEdgar allow you to set up categories or queues (e.g., a queue for “tips”, one for “promotions”, etc.) and specify times for each category.
This can help maintain the content mix automatically (e.g., every Tuesday slot is filled from the “Tip” category). If your tool supports it, it’s worth organizing in this way so you don’t accidentally schedule too many of the same type of post back-to-back. - Preview Your Scheduled Posts: Always use preview functions to see how a post will look on each platform. This helps catch issues like a cut-off image, or a missing line break, or a hashtag that didn’t carry over.
It’s especially crucial for Instagram (check the line breaks/formatting) and for ensuring any links in your posts are correct (note: Instagram doesn’t allow clickable links in captions, so tools might warn you if you included one). - Stay Organized with Assets: As you schedule posts with media, keep your images/videos organized. Some tools have a media library where you can upload and label images.
Alternatively, maintain a folder system on your computer/drive (e.g., subfolders for “Facebook images” or by date). This prevents confusion when scheduling, so you attach the right graphic to the right post. It also makes it easier if you need to reuse a visual later – you know where to find it. - Monitor Posts After Publishing: Just because a post was scheduled doesn’t mean you’re done. Check that it is indeed published properly at the right time (especially when you first start using a tool). Sometimes there are hiccups (maybe a network API issue) and a post might fail to publish.
Most tools will alert you if that happens. But it’s good to manually spot-check occasionally. Also, after publishing, make sure to respond to any comments in a timely manner – your scheduling tool might have a social inbox to do this, or you can do it directly on the platform. - Don’t Schedule Too Far Out Without Review: It’s okay to have a month or more of content planned, but avoid the mistake of completely forgetting what’s in the pipeline. World events or local events can change the context. Do a quick review of your upcoming week’s scheduled posts at least once a week.
Ensure nothing is inappropriate or mistimed given any recent developments. For instance, during sensitive times (say there’s a local emergency), you might pause your normal promotional posts out of respect. Scheduling tools usually have a “pause all” or “pause queue” feature if needed. - Leverage Analytics from Tools: Many scheduling platforms provide their own analytics or at least aggregate data from the networks. Use these to supplement the native platform insights.
It can be convenient to see a cross-platform report in one place. For example, Hootsuite or Sprout might show you engagement across all your channels in one dashboard.
This can save time and help you compare performance. Some tools even suggest optimal times to post based on your own data (e.g., Buffer and Later provide best time suggestions, Sprout Social has ViralPost technology). Take advantage of those features to refine scheduling. - Consider Automation for Content Curation: A calendar not only schedules your own content, but you might also plan curated content (sharing others’ content) if it’s part of your strategy. Tools like Post Planner can help find shareable content relevant to your audience.
While you should always review any content before posting, these tools can fill a “content queue” with suggested articles or memes. This can complement your original posts and keep your feed active. Just ensure curated content fits your brand and will interest your followers.
By following these practices, you ensure that automation serves your strategy effectively without letting things run on auto-pilot to a fault. The combination of a well-thought-out calendar and smart use of scheduling tools can significantly lighten the load of social media management for a local business owner, while still reaping the marketing benefits.
Frequently Asked Questions (FAQs) about Social Media Posting Calendars
In this section, we’ll address some common questions small business owners have when creating and using a social media posting calendar.
Q1: How far ahead should I plan my social media content calendar?
A: It depends on your comfort level and the nature of your business. Many businesses find it effective to plan content about one month in advance. This gives you a clear roadmap but is still near-term enough to adjust if needed.
Planning a month out might involve setting a theme or campaign focus for that month (e.g., “Holiday specials in December”) and specific posts for each week. However, you don’t necessarily schedule all of them at once; you might schedule one week at a time.
Some very organized social media managers plan quarters ahead or even a year’s calendar of major campaigns (especially for predictable events like holidays), but they will revisit and tweak along the way.
For a local shop, a good approach is: plan monthly, refine weekly. At the end of each month, outline next month’s key posts (special events, holidays, etc.). Then, each week, add any timely content or last-minute ideas for the week ahead and schedule those.
This keeps your calendar flexible. Always leave a little room for spontaneous posts – for example, if something trendy or newsworthy comes up that relates to your business, you can slot it in. The calendar shouldn’t feel like it’s locking you in too rigidly; it’s there to ensure you always have content ready and don’t miss opportunities.
Q2: What are some free tools or templates I can use if I’m on a tight budget?
A: If you’re looking for free or low-cost ways to get started:
- Templates: Many marketing blogs and sites offer free social media calendar templates (often in Excel or Google Sheets format). For example, companies like HubSpot, Hootsuite, or even the Birdeye guide provide downloadable templates where you just fill in your content details. These can save you the trouble of designing a format from scratch.
- Google Sheets or Excel: A simple spreadsheet is completely free and very effective. You can even find Google Sheets templates in the Google Sheets template gallery for social media calendars.
This allows easy sharing and editing from anywhere. Using color coding and filters in a sheet can mimic more advanced tools in a basic way. - Google Calendar: Also free – you can create events for each post. It won’t store your content, but you can paste the caption into the description. You can even set the calendar to email you a notification when it’s time to post (if you were doing it manually).
- Meta Business Suite (Facebook/Instagram): As mentioned, it’s free to schedule FB and IG content. So if those are your main channels, you can use it not just to schedule but also to visualize a bit of a calendar (it has a Planner view that shows scheduled posts on a calendar). It also provides some templates and ideas in their creative hub.
- TweetDeck: Free for Twitter scheduling and monitoring. Highly recommended if Twitter is in your mix, since it’s provided by Twitter itself and has robust functionality.
- Buffer Free Plan: Buffer’s free tier lets you connect up to 3 social channels and schedule up to 10 posts per channel at a time for free. This is usually enough for a week of posts across a few platforms, absolutely free. If you just want to try automating and see how it works, this is a great starting point.
- Other Free Trials: Most paid tools have a free trial (7 days, 14 days, sometimes 30 days). You could try Hootsuite or Later or Sprout on a trial to see if you like their interface for planning.
Just remember to cancel if you don’t want to continue, to avoid charges. Also, some tools offer discounts for annual plans or have very cheap starter plans for single users.
In summary, you don’t have to spend money to create a social media posting calendar. Start with free resources and upgrade later if you feel the need for more automation or analytics.
Q3: How often should a small local business actually post on social media? Won’t too many posts annoy followers?
A: Finding the right posting frequency is important. You want to stay on your audience’s radar without overwhelming them. Based on industry benchmarks, a small business should aim to post at least a few times per week on each key platform.
Consistency matters more than high frequency. For example, posting 3-4 times a week on Facebook and Instagram can be very effective, and you can build up from there if you have more content and engagement.
Most followers won’t be annoyed by one post a day in their feed – in fact, due to algorithms, they might not even see all of them. “Too many updates” can become an issue if you’re posting multiple times a day with low-value content on platforms like Facebook or Instagram.
But if each post provides some value (information, entertainment, or a deal), people generally appreciate it. The key is to ensure a variety of content (not five sales pitches in a row, for instance).
It’s also okay to post more frequently on fast-paced platforms (e.g., Twitter or Stories) than on slower ones. As a rule of thumb from marketing agencies: about 1-2 posts per day on Facebook, 1 post per day on Instagram or 3-5 a week, 3-5 tweets per day on Twitter, 1 post per day on LinkedIn at most, and a few TikToks per week is a solid starting point.
You can adjust up or down based on audience reaction. If engagement drops and unfollows rise, maybe scale back. If you get great feedback and have more to share, you can try increasing.
Remember, quality > quantity. Three engaging posts in a week will do more for you than seven rushed posts that no one interacts with. So find a sustainable rhythm using your calendar – even if it’s a bit conservative – and stick to it.
Q4: Can I post the same content on all platforms, or should I create different content for each?
A: You can recycle the same core idea across platforms, but it’s best to tailor the format and details to each platform. In your calendar, you might have a single content idea (say, “New product release this Friday”) and plan a Facebook post, an Instagram post, a tweet, etc., around it. It’s fine – even efficient – to promote the same thing across channels, as you reach slightly different audiences on each.
However, avoid the mistake of literally copying and pasting the identical post (same text, same image) to every platform. It can look lazy or out of place (for instance, tagging a Facebook event link in an Instagram post won’t work, or using 20 hashtags on Facebook looks odd whereas it’s normal on Instagram).
Here’s how you might vary content:
- On Facebook, you might post a couple paragraphs describing the new product and include a link to your website or a video demo.
- On Instagram, you’d choose an eye-catching photo of the product, write a concise caption with maybe a few key hashtags, and maybe use Instagram Stories to add some extra commentary.
- On Twitter, you’d write a one-liner teaser with a relevant hashtag and link, keeping within the character limit.
- On TikTok, maybe make a 15-second unboxing or showcase a video of the product.
- On LinkedIn (if relevant), you might angle the post as a business milestone or share an article about the product’s development.
All these stem from one piece of content but are adapted. This practice is sometimes called “repurposing content”, and it’s a smart way to maximize your effort across platforms. It ensures each post feels native to the platform. It also considers that what works on one platform (e.g., a meme format on Twitter) might not work on another (that meme might flop on LinkedIn, for example).
Your content calendar can have entries that note these adaptations. E.g., on your calendar: June 1st – “Product X Launch” (FB: photo & link post; IG: Reel video; Twitter: text announcement). Planning it together ensures consistency in messaging but allows customization in execution.
Q5: What if I don’t have enough content ideas to fill a posting calendar? I’m worried I’ll run out of things to post.
A: This is a common concern, but there are ways to generate plenty of content ideas and not run dry:
- Use Content Themes and Series: Establish weekly or monthly themes. For example, decide that every Wednesday is a “Customer Spotlight” and every Friday is a “Behind-the-scenes” post.
This gives you a repeatable framework. If you know on your calendar that each week you need one tip, one product feature, one customer story, etc., it narrows your brainstorming to specific buckets rather than starting from scratch each time. - Curate Content: Not everything has to be originally created by you. You can share relevant articles, videos, or posts from others (with credit). For instance, a local health food store could share a link to a news article about healthy eating tips and add their commentary.
Or share a beautiful photo of your town taken by someone (credit them!). Just ensure curated content aligns with your brand and will interest your audience. It breaks the pressure of always creating fresh content and shows you’re in touch with the larger community/industry. - User-Generated Content (UGC): Encourage your customers to share their own photos or experiences related to your business, and (with permission) repost those. For example, if a customer tags your boutique showing an outfit they bought, ask if you can feature it.
People love seeing real customer stories, and it relieves you from creating that piece of content. Make it part of your calendar to include UGC maybe once a week or as available. - Repurpose and Recycle: Good content can be reused. Did you have a post 6 months ago that performed really well? There’s no rule saying you can’t bring it back (maybe in a slightly new way).
For example, if you posted a “Top 5 tips” list in a caption that got great engagement, you could later make each tip into a separate post with more detail. Or compile them into a quick video.
Also, across platforms, something that was big on Instagram might not have been seen by your Facebook audience, so you can repurpose it there. A content calendar helps track what you’ve done so you can intelligently recycle content without being too repetitive. - Plan Ahead for Seasons: Some times of year naturally have more content (holidays, back-to-school, etc.). Anticipate those and perhaps create extra content then. During slower periods, you can use more evergreen content (timeless tips or stories).
Also, if you find yourself with downtime, create some “evergreen” posts and keep them in reserve (not scheduled yet). That way, if you hit a creative block, you have a backup post ready to fill a gap. - Ask Your Audience: Sometimes just asking followers what they want to see can spark ideas (and engagement). You could post a question sticker in Instagram Stories like “What behind-the-scenes of our shop are you curious about?” or run a poll about what content they enjoy most. Their answers might directly become content ideas for you.
- Use Content Idea Tools: There are social media “holidays” calendars that list daily topics, as mentioned earlier. Those can give quirky ideas. Also, some scheduling tools have built-in idea suggestions, and many marketing blogs publish monthly ideas.
While you want to remain original to your brand, a prompt like “It’s National Coffee Day” can ignite an idea (like offering a coffee deal if you’re a bakery, or simply a fun post acknowledging it).
In short, if you organize content into categories and make use of existing resources (customer content, industry content), you’ll likely find you have more ideas than you have days to post. A calendar is great for parking those ideas into future slots so you never feel last-minute panic.
Q6: How do I measure success or know if my social media calendar is working?
A: Success on social media can be measured in several ways, depending on your goals. Here are a few metrics and indicators that your calendar-driven strategy is paying off:
- Consistency Achieved: First off, a more operational success metric – are you actually posting consistently according to plan? If yes, that’s already a win compared to before. The calendar is helping you stay active, which is the foundation for any further success.
- Engagement Metrics: Look at your engagement rate (likes, comments, shares, saves, retweets, etc.). Is it improving over time? For example, maybe you averaged 5 likes per post last month and now it’s 10 – that’s growth.
Comments and shares are especially valuable as signs of resonance. Track these over months. Some posts will do better than others, so identify patterns (did content planned around certain ideas spark more interest?). High engagement means your content is hitting the mark. - Follower Growth: A steady increase in followers or page likes indicates growing reach. If your calendar keeps you active and engaging, you should see more followers coming in.
Keep an eye on not just the raw number but the rate – e.g., gaining 50 followers a month vs. 20 previously. That said, focus on quality followers (local and interested) over quantity. - Traffic and Sales (if applicable): If one of your goals was driving people to your website or store, see if your social media efforts correlate with web traffic (check Google Analytics for traffic from social sources) or with foot traffic/sales (perhaps you shared a coupon code on social media – did people use it in store?).
On Google or Instagram, you might use UTM tracking links for promos to measure clicks. A content calendar often helps tie social posts to campaigns (like “Jan 15 Facebook post – Winter Sale link”), so you can more easily attribute outcomes to those posts. - Analytics KPIs: Each platform’s analytics might give you summary metrics like “post reach” or “impressions” per period. For example, Facebook might show that this week you reached 5,000 people versus 3,000 last week.
If your calendar made you increase posting, likely your overall reach and impressions will grow. You can set specific targets, like “Improve average reach per post by 20% in 3 months” and use the data to check progress. - Time Saved/Productivity: Don’t overlook internal metrics. How much time are you spending on social media now versus before? If using a calendar and scheduling has cut down the daily stress and time spent, that’s an efficient success.
Perhaps before you were scrambling daily, and now you spend 2 hours a week scheduling and little time day-to-day aside from checking in. That time saved is valuable for your other business tasks. - Community Feedback: Qualitative measures count too. Are customers mentioning your great social media content in person? Do you see more comments like “Love this post!” or people tagging friends? These are signs your content is engaging.
Also, if you start getting more DMs/inquiries via social media, it suggests your active presence is encouraging people to reach out (just be sure to respond promptly).
Every month, review these kinds of metrics and compare them with your goals. The measure and adjustment step we discussed is crucial. If something isn’t meeting expectations (e.g., follower count flat), you might tweak your content strategy or ramp up engagement efforts.
If something is doing great (e.g., lots of clicks from Facebook posts), double down there. Over time, a well-maintained social media calendar should lead to noticeable growth in your online presence and engagement, which ultimately supports your business (through increased brand awareness, customer loyalty, and sales).
Conclusion
Creating a Social Media Posting Calendar for local shops is a powerful way to bring organization and strategy to your social media marketing. Instead of posting haphazardly, you’ll be planning content that aligns with your business goals, scheduling it for consistent output, and tailoring it to each platform for maximum impact.
For any small business owner or local entrepreneur, a content calendar can save time, reduce stress, and improve the quality and frequency of your social media posts.
In this guide, we covered how to set up your calendar step-by-step – from defining goals and choosing the right platforms, to brainstorming diverse content and determining how often to post. We also delved into platform-specific tips (covering Instagram, Facebook, TikTok, and more) so you can adjust your approach for each audience.
Incorporating automation tools like scheduling software or native schedulers will help you maintain a steady presence without needing to be online 24/7. Remember to follow best practices when scheduling: keep content authentic, monitor your posts, and be ready to make adjustments as you gather insights.
By staying consistent and engaging with your audience through a planned calendar, you’ll likely see growth in followers and interactions over time. More importantly, you’ll build a stronger connection with your local community online – turning online engagement into in-store visits or online sales.
Whether you’re a boutique retailer, a local restaurant, or any community-based business, a well-executed social media calendar is your roadmap to a vibrant and effective social media presence.
Now, armed with these tips and strategies, it’s time to put pen to paper (or fingers to keyboard) and start planning your own social media posting calendar. Stay flexible, keep an eye on what works, and don’t be afraid to experiment with new ideas.
Social media is always evolving, but with a solid calendar in place, you’ll be better prepared to navigate the changes and keep your business’s voice consistently heard. Happy planning and posting!